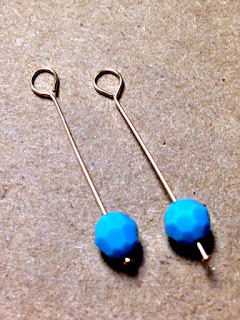
Happy Independence Day and Maker's Monday! This week, I decided to plan a little bit better. I had a handful of gold-filled headpins and beads left from a class I taught, so I thought I'd use them up. I also had a few wonderful Swarovski crystals in Turquoise that I just love with pretty much any metal. As always, I've linked
supplies to where I have purchased them but you may buy them elsewhere.
Supplies:
6
gold-filled headpins (1.5 inches long)
2
6mm round Swarovski crystals in Turquoise
4
gold-filled saucer beads
2
gold-filled ear wires
Tools:
Jeweler's pliers (one or two pairs, depending on your preference)
Flush cutters
Instructions:
1. This pair of earrings is a bit different in that we'll use different lengths of headpins. Slide a Swarovski onto a headpin. With the tips of your pliers, make a 90 degree bend in the headpin just under 1/2 of an inch from the end of the tail. Repeat for the other headpin.
2. Line up two headpins and cut them about 1/8 inch from the tip of the tail. Add a gold bead to each headpin.
3. Line up the remaining two headpins and cut them about 1/4 inch from the tip of the tail. Add a gold bead to each headpin.
4.
Go ahead and make your 90 degree bends in the remaining headpins. A quick way to do this is to line up two same-sized headpins and make a 90 degree bend in both at the same time.
5. Now you'll make your loops. Line the very end of a 90 degree bent headpin and bead up with the mark on your pliers.
Make sure the mark is facing up and clamp the pliers around the end of
the headpin—hold the rest of the wire tightly with your other hand. Line the headpin up on that mark and make
sure the pliers are at the very end of the headpin. Hold the pliers tightly and "roll"
them toward you to make a loop. You will
notice that you can only roll them so far before you have to stop. Readjust your hands on the pliers and make
sure the pliers are snug in the loop you've started. Finish rolling the pliers toward you. Repeat for the other two headpins.
6. Now you'll add your looped headpins to your ear wires. Slightly open one of your
ear wire loops by clasping it in
the pliers with one hand and holding it firmly between your thumb and index
finger of your other hand. Gently twist the pliers away from you and the loop should open.
7. Add the longest headpin followed by the next longest and then the shortest. Make sure the openings of your loops are all on the same side so the finished earrings don't look sloppy.
8. Close the loop of the ear wire by reversing the twisting motion of step 6. Repeat for the other ear wire.
I hope you like this earring style! Let me know what you think in the comments and what metals and colors you would try it in.


Comments
Post a Comment